Build your first app with AI
Start from a brief and let Insites Studio scaffold a working application end to end.
This tutorial walks the Build with AI on-ramp from blank slate to a deployed app. You'll fill out a nine-step brief (Basics → Industry → Function → Style → Color → Type → Layout → Review → Deploy), let Studio scaffold the project, review the AI's first wave of patches, and ship to your Dev instance.
What you'll build
A small working app — landing page, dashboard, and one core flow — generated from your brief. The exact shape depends on what you describe, but the journey is the same.
Before you start
You need:
- An Insites workspace you're a member of.
- A connected GitHub repo and at least one CloudShell instance to deploy to. (If you don't have these yet, your workspace admin sets them up under Workspace settings and the project's Integrations tab.)
Roughly 30–45 minutes end to end. Most of it is the brief; the AI's first scaffold is fast.
Steps
Open the New Project flow
From the workspace dashboard, click New project → Build with AI. You'll land on the first step of the brief.
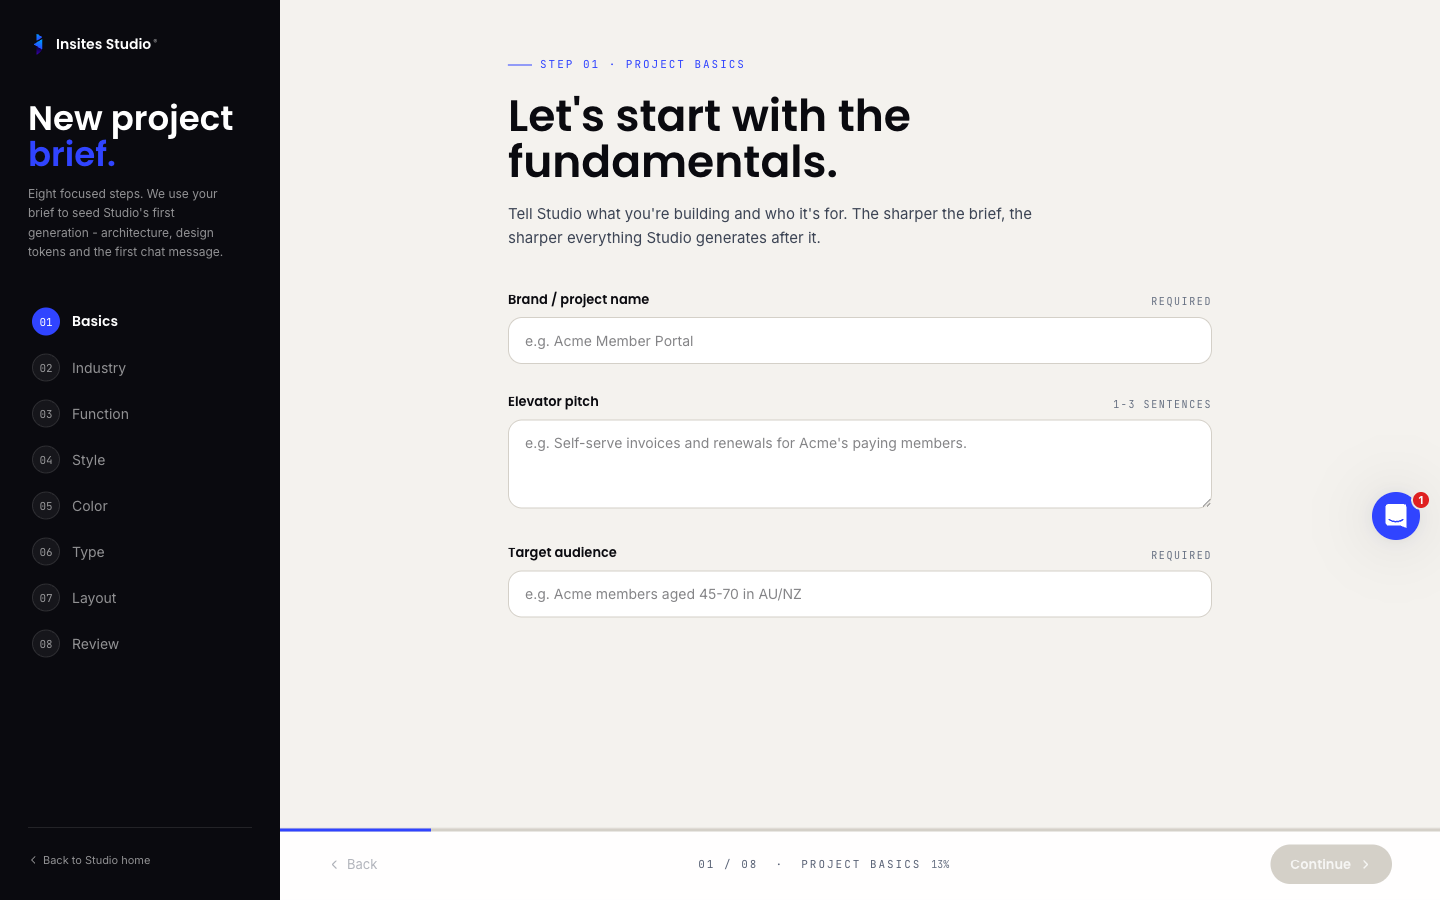
Step 1 — Basics
Fill in:
- Brand name (required).
- Elevator pitch (1–3 sentences). Be specific about what the product does and for whom.
- Target audience (required).
The pitch matters. Studio's AI uses it to make naming, copy, and structural decisions later.
Step 2 — Industry
Pick your industry from the 11 presets. Studio uses your selection to pre-fill the next few fields with sensible defaults — primary goal (7 options), stage (greenfield, replacing, adding, validating).
You can override any pre-fill. The presets are starting points, not constraints.
Step 3 — Functionality
The longest step. Choose the project type (multi-select across 7 options: marketing site, portal, internal tool, ecommerce, event, directory, mobile). If you pick ecommerce, conditional sub-fields appear for catalogue size, payment providers, order model, shipping, tax, inventory, and storefront extras.
Then describe the must-have features, anything explicitly out of scope, user roles, permissions, auth methods, data model, content sources, CMS style, search behaviour, languages, and integrations.
Don't over-think it. You're describing the project, not architecting it. The AI fills the gaps.
Step 4 — Style
Pick aesthetic adjectives (multi-select across 12 options: minimal, playful, editorial, technical, etc.).
Optionally upload brand guidelines (PDF, DOCX, PPTX, image, or Figma file). Studio extracts the palette and fonts automatically and shows the result in step 5. You can also paste links to brand assets, references, and anti-references.
Step 5 — Color
Pick palette directions (multi-select across 12 swatches) and an overall tone: light & airy, dark & moody, high contrast, muted, or saturated.
If you uploaded brand guidelines in step 4, the extracted palette pre-fills here.
Step 6 — Type
Choose heading style, body style, and typography scale. Five options each.
Step 7 — Layout
Pick a primary layout direction (7 options from grid to dashboard to magazine), select your key surfaces (multi-select across 14: landing, dashboard, list, detail, forms, search, settings, auth, onboarding, admin, reports, notifications, help, empty states), and optionally describe the sitemap and button/UI style.
The key surfaces selection drives which screens the AI scaffolds first.
Step 8 — Review
Tick the deliverables you want (working app, design system, component library, homepage, auth+dashboard, marketing pages, admin, API endpoints), pick an accessibility target (WCAG 2.2 AA, AAA, best-effort, or not yet), and add any special requirements.
Studio compiles the brief into a single JSON-shaped block at the bottom. There's a copy-to-clipboard button if you want to save it externally.
Hit Build my Project.
Watch the scaffold land
Studio creates a new project, opens it in the editor, and starts the AI's first turn. Files arrive as patches in the Pending Patches card under the assistant's message. The default approval mode is Confirm, so nothing applies automatically — every patch waits for your review.
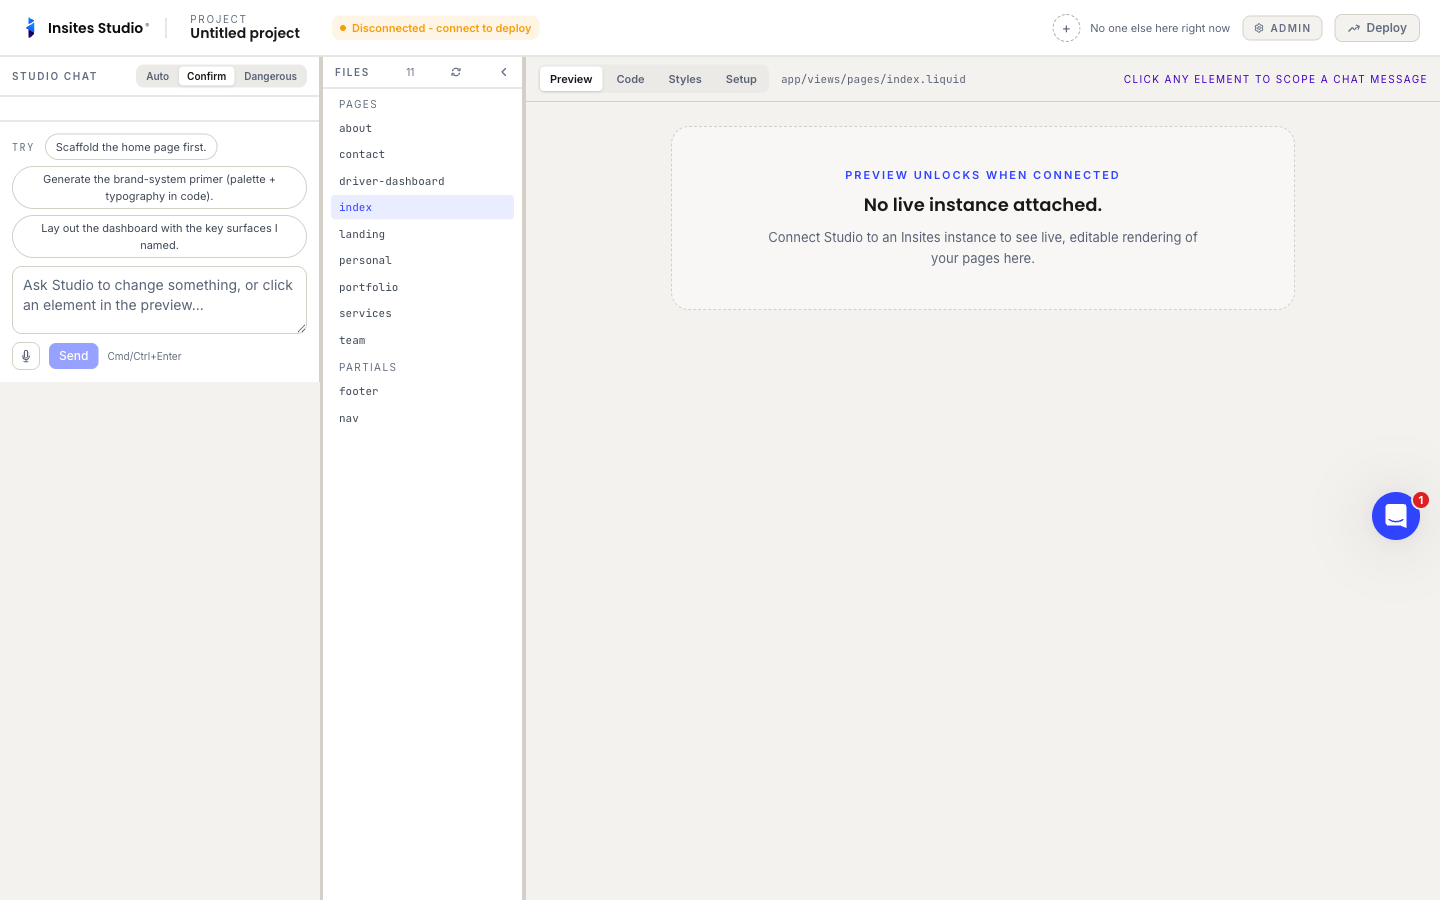
The Studio surface: chat on the left, files in the centre, live preview on the right. For a first pass, Accept all is usually what you want. You'll catch issues faster by seeing the whole scaffold and prompting fixes than by individually reviewing 40 patches.
Iterate
Talk to the AI like you would a teammate. Ask for changes:
- "The hero copy doesn't sound like our voice. Make it more direct, less marketing-speak."
- "Add a pricing page using the same layout pattern as the homepage."
- "The dashboard is missing the empty state we discussed."
Each prompt produces a fresh batch of patches. Accept the good ones, reject or re-prompt the misses. Switch to Auto mode if you want safe additive changes to apply themselves.
See Use the AI prompt for a longer guide on prompting effectively.
Deploy
When you're happy with the in-browser state, hit Deploy. The deploy panel streams two things: the GitHub commit, then the CloudShell deploy. When both complete, your Dev instance has the latest.
Switch the centre pane to Preview to see the live result.
What's next
- Promote to Staging when Dev is solid — see Publish a project.
- Invite a teammate — they can edit the same files in real time. See Manage members.
- Wire integrations — Stripe for ecommerce, Slack for deploy notifications, Figma for design imports. See Project workspace → Integrations.
Common questions
Can I change the brief later? The brief lives in the project's settings; you can edit and regenerate any section. The AI uses the latest brief on every turn.
The AI keeps suggesting the same change. Tell it explicitly: "Stop suggesting X. Move on to Y." Studio's AI honours direct instructions.
A patch destroyed something I wanted to keep. Hit Reject. The original is untouched until Deploy. If you've already deployed, use the project home's per-instance Deploy history → Rollback menu to revert.